Making Friendship Bracelets for Taylor Swift’s Eras Tour
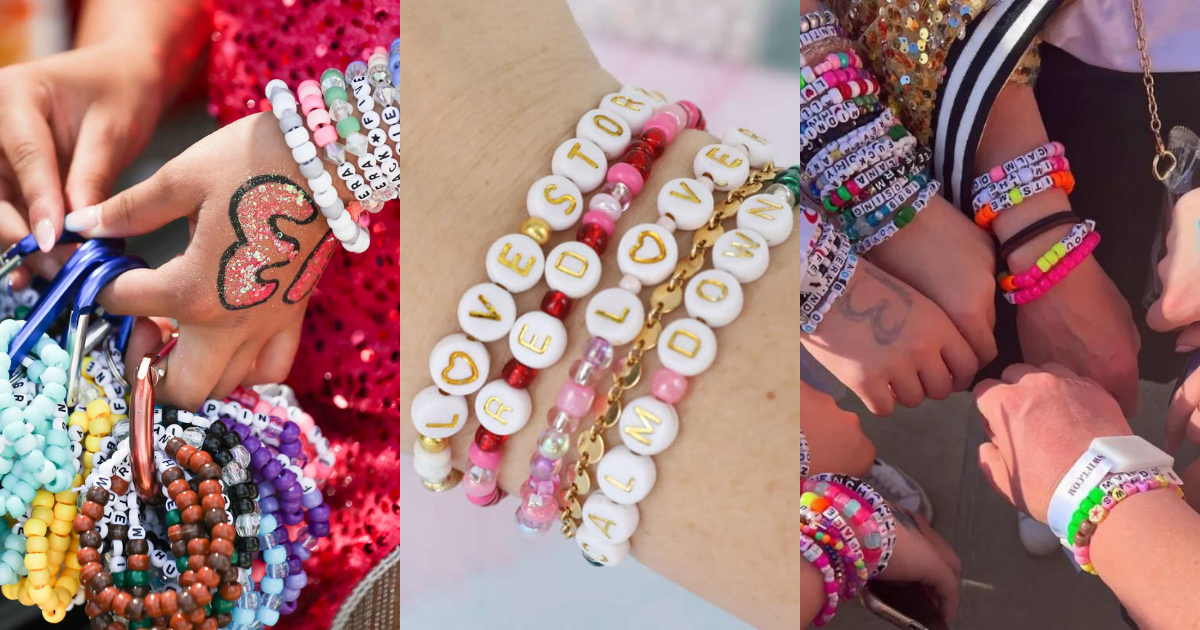
With Taylor Swift’s Eras Tour coming up, there’s a super fun trend you don’t want to miss: making and trading friendship bracelets!
Inspired by the line “So make the friendship bracelets, take the moment and taste it” from Taylor’s song “You’re On Your Own Kid,” fans have embraced this creative way to connect with each other.
Whether you’re a DIY newbie or a bracelet-making pro, here’s everything you need to know to get started.
Why Do People Make Friendship Bracelets For Taylor Swift?
Friendship bracelets are a perfect way to show your Swiftie spirit and connect with fellow fans. They’re easy to make, customisable, and a great keepsake to remember the concert. Plus, trading them with other fans is a fun way to make new friends!
What You’ll Need To Make Taylor Swift Friendship Bracelets
Before you start crafting, gather these essential supplies:
- Embroidery Floss or String: Choose a variety of colours that represent different Taylor Swift eras or your favourite albums.
- Scissors: A sharp pair to cut the strings.
- Tape or Clipboard: To hold your bracelet steady while you work.
- Beads and Charms: Add some sparkle and personalisation with beads and charms that reflect your favourite songs or lyrics.
@lisa.by.design Make a two string folklore friendship bracelet with me 🤍 #taylorswift #friendshipbracelets #erastour #smallbusinessowner #taylorswiftfriendshipbracelets #friendshipbraceletideas #folklore #bracelettutorial #friendshipbracelettutorial ♬ daylight - r7ptor
Getting Started
Step 1: Choose Your Colors
Pick colors that represent different eras of Taylor’s music. For example:
- Debut: Green and white
- Fearless: Gold and yellow
- Speak Now: Purple and pink
- Red: Red and black
- 1989: Blue and white
- Reputation: Black and silver
- Lover: Pastel pink, blue, and purple
- Folklore: Grey and green
- Evermore: Orange and brown
- Midnights: Dark blue and silver
- The Tortured Poets Department: White, black and gold
Step 2: Cut Your Strings
Cut several pieces of embroidery floss about 60-70 cm long. You’ll need at least three strands, but you can use more for a thicker bracelet.
Step 3: Secure Your Strings
Tie a knot at one end of your strings and tape it down to a flat surface or secure it with a clipboard. This keeps your bracelet steady as you work.
@courtneysdays Australian show girlies who are stress making bracelets ive got you #erastour2024 #erastour #erastouraustralia #taylorswift #friendshipbracelets #braceletmaking #howtotiebracelet #taylornation ♬ is it over now? - Taylor's Version From the Vault - misswilsonsays
Step 4: Start Adding Beads
If you want to add beads or charms, thread them onto the strings before you finish the bracelet. You can use letter beads to spell out favorite lyrics or album titles.
Step 5: Finish Your Bracelet
When your bracelet is the right length, tie a final knot to secure it. Trim any excess string, and you’re done!
Tips For Trading Friendship Bracelets At The Eras Tour
- Make Extras: Bring more than one bracelet to trade with other fans.
- Be Friendly: Trading bracelets is all about spreading joy and connecting with fellow Swifties.
- Show Your Style: Make bracelets that reflect your personality and favorite Taylor Swift moments.
@innava.jewelry Antwort auf @✨Juliana And Scarlet✨ #tylorswift #erastour #swifttok #taylorsversion #swiftie #ts11 #tutorial #smallbusiness #beads #handmadejewelry #viral #fyp #friendshipbracelets #makethefriendshipbracelets #beadsjewelry #handmade #tpd #ttpd #bracelets #bracelettutorial ♬ cornelia street - ౨ৎ
Final Touches
- Pack Carefully: Store your bracelets in a small bag or container to keep them tangle-free until the concert.
- Share on Social Media: Show off your creations using hashtags like #ErasTourBracelets to connect with other fans online.
If Crafting Isn’t Your Thing
If you want to take part in friendship bracelet trading at The Eras Tour, or if you just want to wear some Taylor inspired bracelets for you show and you don’t have the time/inclination/skills for bracelet making you can buy pre-made Eras Tour bracelets.
We recommend checking out Etsy and Vinted for pre-made packs of bracelets. Amazon also sell some Eras Tour friendship bracelets.